The Elder Scrolls 4: Oblivion is a vast open world that’s easy to get lost in as you begin your adventures across the realm of Cyrodiil. With 9 major cities, several guilds, and countless quests to undertake, it can be hard to know where to go first after completing the tutorial. That’s why we’ve compiled the 9 Best Things to Do First in Oblivion, complete with helpful checklists to keep track of your progress!
Save At the Sewers!

The most important thing you need to do technically happens before leaving the tutorial, so don’t forget this one! After creating your character, choosing your birthsign, class and preferred attributes, and stumbling through the escape tunnels and sewers, you’ll finally see the end in sight.
It’s at this point that it’s highly recommended you create a Save File. Upon reaching the sewer exit gate, you’ll be given one last chance to effectively change any aspect of your character that you may not like, including their looks and stats – and even your name!

This is very important, as any time you want to try making a new character, you can use this save file instead of having to replay the lengthy tutorial section just to get back to the open world again. Since you can change your character’s race and name before exiting, this makes it a much better way to create new characters or try different playstyles.
Score a Free Place to Sleep (And Store Items)

Believe it or not, sleeping is an important part of The Elder Scrolls, as you’ll need to sleep in a bed any time you’ve increased your major skills enough to trigger a level up. Not just any bed will do either — your character can only sleep in beds that aren’t owned by someone else, meaning you’ll need to either scrounge around for public beds, pay to spend the night in an inn, or buy your own home. With even the cheapest most ramshackle Shack in the Imperial City costing 2,000 coins, it may take a bit of saving before you can call a place your own.
Early on, you’ll likely find several inns that you can stay at, but there are some great free alternatives if you know where to look.
 |  |
The first option is the Abandoned Shack in the Imperial City’s Waterfront District south of the main city. It may not be your house, but it is unlocked, and the bedrolls inside aren’t technically owned by the two characters that often squat in the shack (they may tell you that you need to leave, but they’ll never actually act on it).
 |  |
The second option lies to the north of the Imperial City at the town of Aleswell along the Red Ring Road. The place may look empty, but upon further inspection you’ll find out the residents are actually invisible. Agree to help them to start the Zero Visibility Sidequest, which involves seeking out a nearby wizard, and getting friendly enough with him so that he gives you a scroll to reverse the effects (and a ring to equip so you don’t suffer the scroll’s side effects).

If you’re successful, the town’s residents will offer you a free room at the Aleswell Inn that you can sleep in as much as you like! Even better, the room has a chest of drawers that you can use to store items inside without fear of them disappearing!
Join Some Guilds

One of the main features of any Elder Scrolls game is joining the different guilds that most align with your playstyle. Aside from the Main Questline, the Guilds offer the most engaging storylines as you work your way up the ranks and uncover conspiracies, mysteries, and evil plots. For melee-focused characters, the Fighters Guild offers steady work for solving problems with a weapon, while the Mages Guild will take on new members who show the right aptitude. Those who stick to the shadows can find a secret initiation to the Thieves Guild, while the more murderous characters may draw the attention of the enigmatic Dark Brotherhood.
You can check out the table below for each guild and how to join them. Though it may not seem like it, there’s actually nothing stopping you from joining every guild, and each guild offers different perks and amenities like free gear, places to stay, and access to crafting stations.
Find A Fence For Stolen Goods
This one mostly applies to those of you who are opting for a sneaky character, but is a good thing to have in your back pocket regardless.
Merchants in Oblivion have a nasty habit of recognizing whether the items you want to sell have been stolen or not, be they expensive jewelry or a simple potato. Walking around with stolen items is a risky proposition, because any guard who arrests you for any crime—related or not—will immediately claim all of your stolen goods.

Luckily, you can unlock places to sell your ill-gotten gains by joining the Thieves Guild. By passing the initiation, you’ll immediately have access to a Fence named Ongar the World-Weary up in Bruma, who can buy up to 600 gold worth of hot items at a time. The farther up in the guild you climb, the more Fences you’ll unlock.
Be sure to use the aforementioned chest in the Aleswell Inn to stash your stolen goods in the meantime while you wait for Ongar’s available money to replenish!
Clear Some Early Dungeons
Whether you’re looking to make money fast, find better gear, or level up your major skills, dungeons are Oblivion’s bread and butter method of doing all three. There are over a hundred caves, forts, mines, and ruins all across Cyrodiil, and most of them contain random loot guarded by hordes of monsters.

Be sure to seek out some of the nearest dungeons once you’ve left the Imperial Sewers, as you’ll find many nearby that can be a good source of early XP and loot to haul back to the nearby Imperial City:
- Sideways Cave – located just to the southeast of the sewer you exit where the world first opens up. Likely full of assorted creatures.
- Vilverin – Found just across the water from the sewer exit on a small island northeast of the Imperial City. Some bandits have taken residence up outside and early on in the interior, with undead creatures further in.
- Sinkhole Cave – located along the northwestern shore outside the Imperial City along the water’s edge, and crawling with bandits.
- Dzonot Cave – Found between the main bridge leading out of the Imperial City and the Waterfront District to the south, full of bandits.
- Fatback Cave – Hiding on the farthest southern tip of the island of the Imperial City, on the other side of the Arcane University. Beware of Goblins!
Make Some Potions

Another early way to make a good amount of money fast is to create assorted Potions and sell them whenever you can. You’ll likely get a few Alchemy Tools like a Mortar and Pestle in the tutorial sewers, and finding other tools can increase the potency (and therefore sell value) of your potions. We recommend joining the Mages Guild as they often leave Alchemy Tools and tons of ingredients lying around that you can freely take!

Once you have the tools, seek out and collect as many ingredients as you can find – either from Guild Halls or just looking in barrels in the cities for unowned regents you can freely make potions from.
Get a Free Horse
The realm of Cyrodiil is a vast one, and many of its points of interest are found deep in the wilderness, and running to explore each point of interest that appears on your map can take awhile!

Luckily, you can use horses in Oblivion to travel across the lands at greater speeds (though you need to dismount to fight). Stables can be found near most of the major cities, but a good horse can set you back a lot of gold.
 |  |
One early way to get a free horse is simply by engaging in the main questline. All you need to do is follow the instructions you were given by the Blades to seek out Jauffre at Wenyon Priory and tell him what happened. As you are given your new task, you’ll have the ability to get a lot of supplies for free, including some nice early weapons and armor, potions. Talk to Prior Maborel, and he’ll offer you a free horse! It’s not the fastest, but it’s definitely faster than you and great for traveling to unlock new areas to fast travel to later.
If you still want to follow the Main Quest early for a bit longer, there’s one more thing to look out for…
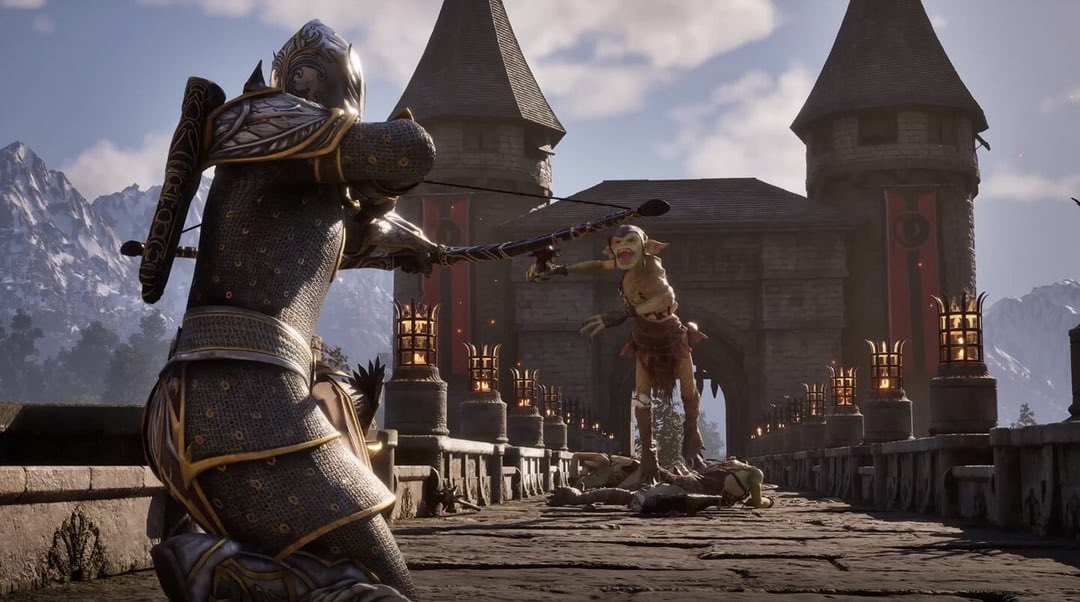
Take Back Castle Kvatch Early

The next main quest will send you to the city of Kvatch, where you’ll soon find things have taken a turn for the worse. Your only real main objective is to find someone named Martin and bring him back to the Priory, but along the way you’ll be asked to help retake the castle.
While it is completely optional, helping out in this secondary Main Quest is well worth your while for a few reasons:
Enemies have a nasty habit of leveling alongside you, and in certain areas this can make some places fairly deadly once you’ve leveled up just a bit. Castle Kvatch is one of these, and if you aren’t careful, the enemies here can become very lethal unless you’re either still low level or have leveled quite a bit with excellent gear — which makes it a great place to clear out early on, given the allies helping you will have an easier time surviving too.
 |  |
The second reason is clearing out the castle will give you a lot of rewards and places to loot from. You’ll also get an enchanted piece of armor for completing the quest, which is a great early reward considering how rare enchanted items are at the start of the game, as it bolsters both your Strength and Endurance!
Find an Enchanted Weapon
Eventually, you’re going to run into certain types of monsters — like ghosts or wraiths — that appear to be entirely immune to your attacks. In fact, these monsters are immune to physical attacks, unless you can find a workaround.
For mages, you can still simply blast them apart with spells, but fighters or sneaky archers will still need something else to get the job done.
Even with basic magic, melee characters can also use the conjuration spells to summon temporary Daedric Weapons, which can hurt otherwise immune undead wraiths – or you can find and keep a few scrolls handy in place of learning the spells themselves.

The second option is to find enchanted weapons – anything that inflicts something besides regular damage when it attacks, as the magical portion of the weapon allows you to attack ghosts and the like. These can be hard to find early on, but are rewarded for completing certain side quests. Just remember – any enchanted weapon will eventually run out of juice and require a filled Soul Gem to replenish its enchantment.

Finally, any silver variant of a weapon also has the power to harm the undead, and while you’d normally only start to see them after reaching levels 4-7, you can find a few early. Try joining the Mages Guild to find Silver Daggers in their Guild Halls, or look around the Fighters Guilds in each city for unowned silver weapons you can borrow.

You can also get two very decent enchanted weapons early by undertaking the Unfriendly Competition Side Quest that begins in the Imperial City Market District. You’ll need to tail a shady merchant and then an even shadier distributor to get the dirt on where he gets his wares.

The quest concludes by tracking him to a mausoleum that won’t open otherwise, and killing the man Argamair will net you his Debaser Sword, but that’s not all!

Hidden away in the mausoleum and very easy to miss is an enchanted mace – Calliben’s Grim Retort. Unlike the Debaser Sword that adjusts its stats to your current level, this unique mace is much stronger — especially for low level characters!